The download contains an Android Package (APK) file. Once downloaded and installed on the Android device, the tracking can begin. After setting the parameters of what data should be tracked, the app collects all necessary data and stores it as comma-separated values (CSV) files locally on the device. Step by step instructions of how to install the app from scratch will be given below (see Step by step instructions).
Technical requirements
To use the current version of our demo tracking app, the following requirements have to be fulfilled:
A minimum Android version of 4.1+ (tested with 4.4+) is needed
The app needs the permissions of working as an accessibility service
Download the demo tracking app
There are two ways how to download the demo tracking app: (1.a) download the APK from Google Play (alpha/beta version) or (1.b) download the app from our server.
Step by step instructions
We tried to create the following step by step instructions as generic as possible. The used screenshots were taken from a Samsung Galaxy S6 device, so some things might look a little bit different on your device.
Download the APK
Download and install the APK file from Google Play
Download the automate app from here.
Download from our server
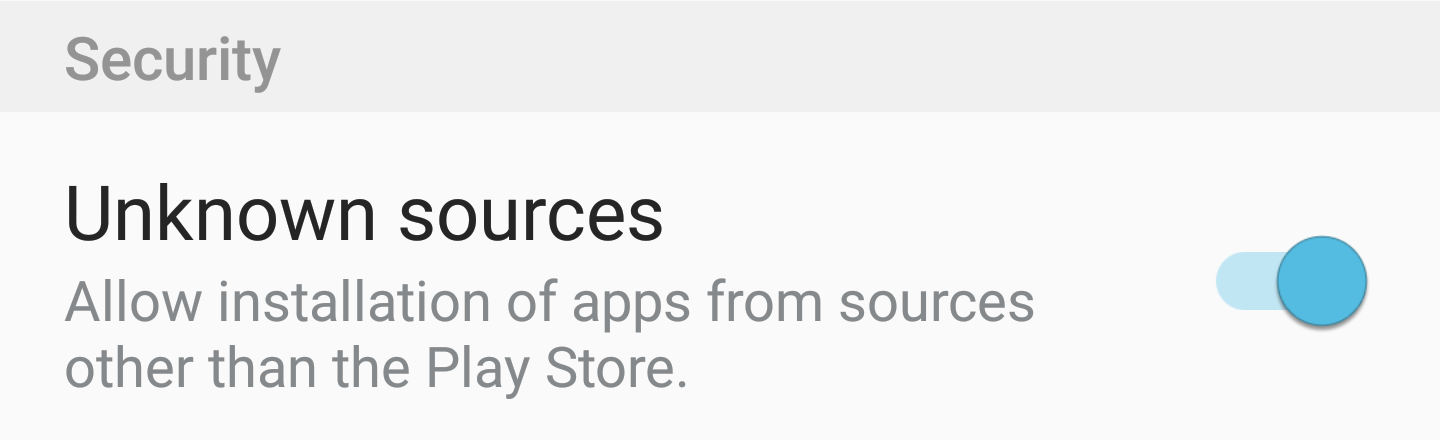
If your device does not have access to the Google Play store, the first step is to allow the installation of apps from unknown sources. This setting can be found in: Settings -> Security
The setting should look somehow like shown in the figure underneath.
Figure 5. Setting to allow installation from unknown sources.
More information can be found at the android developer page.
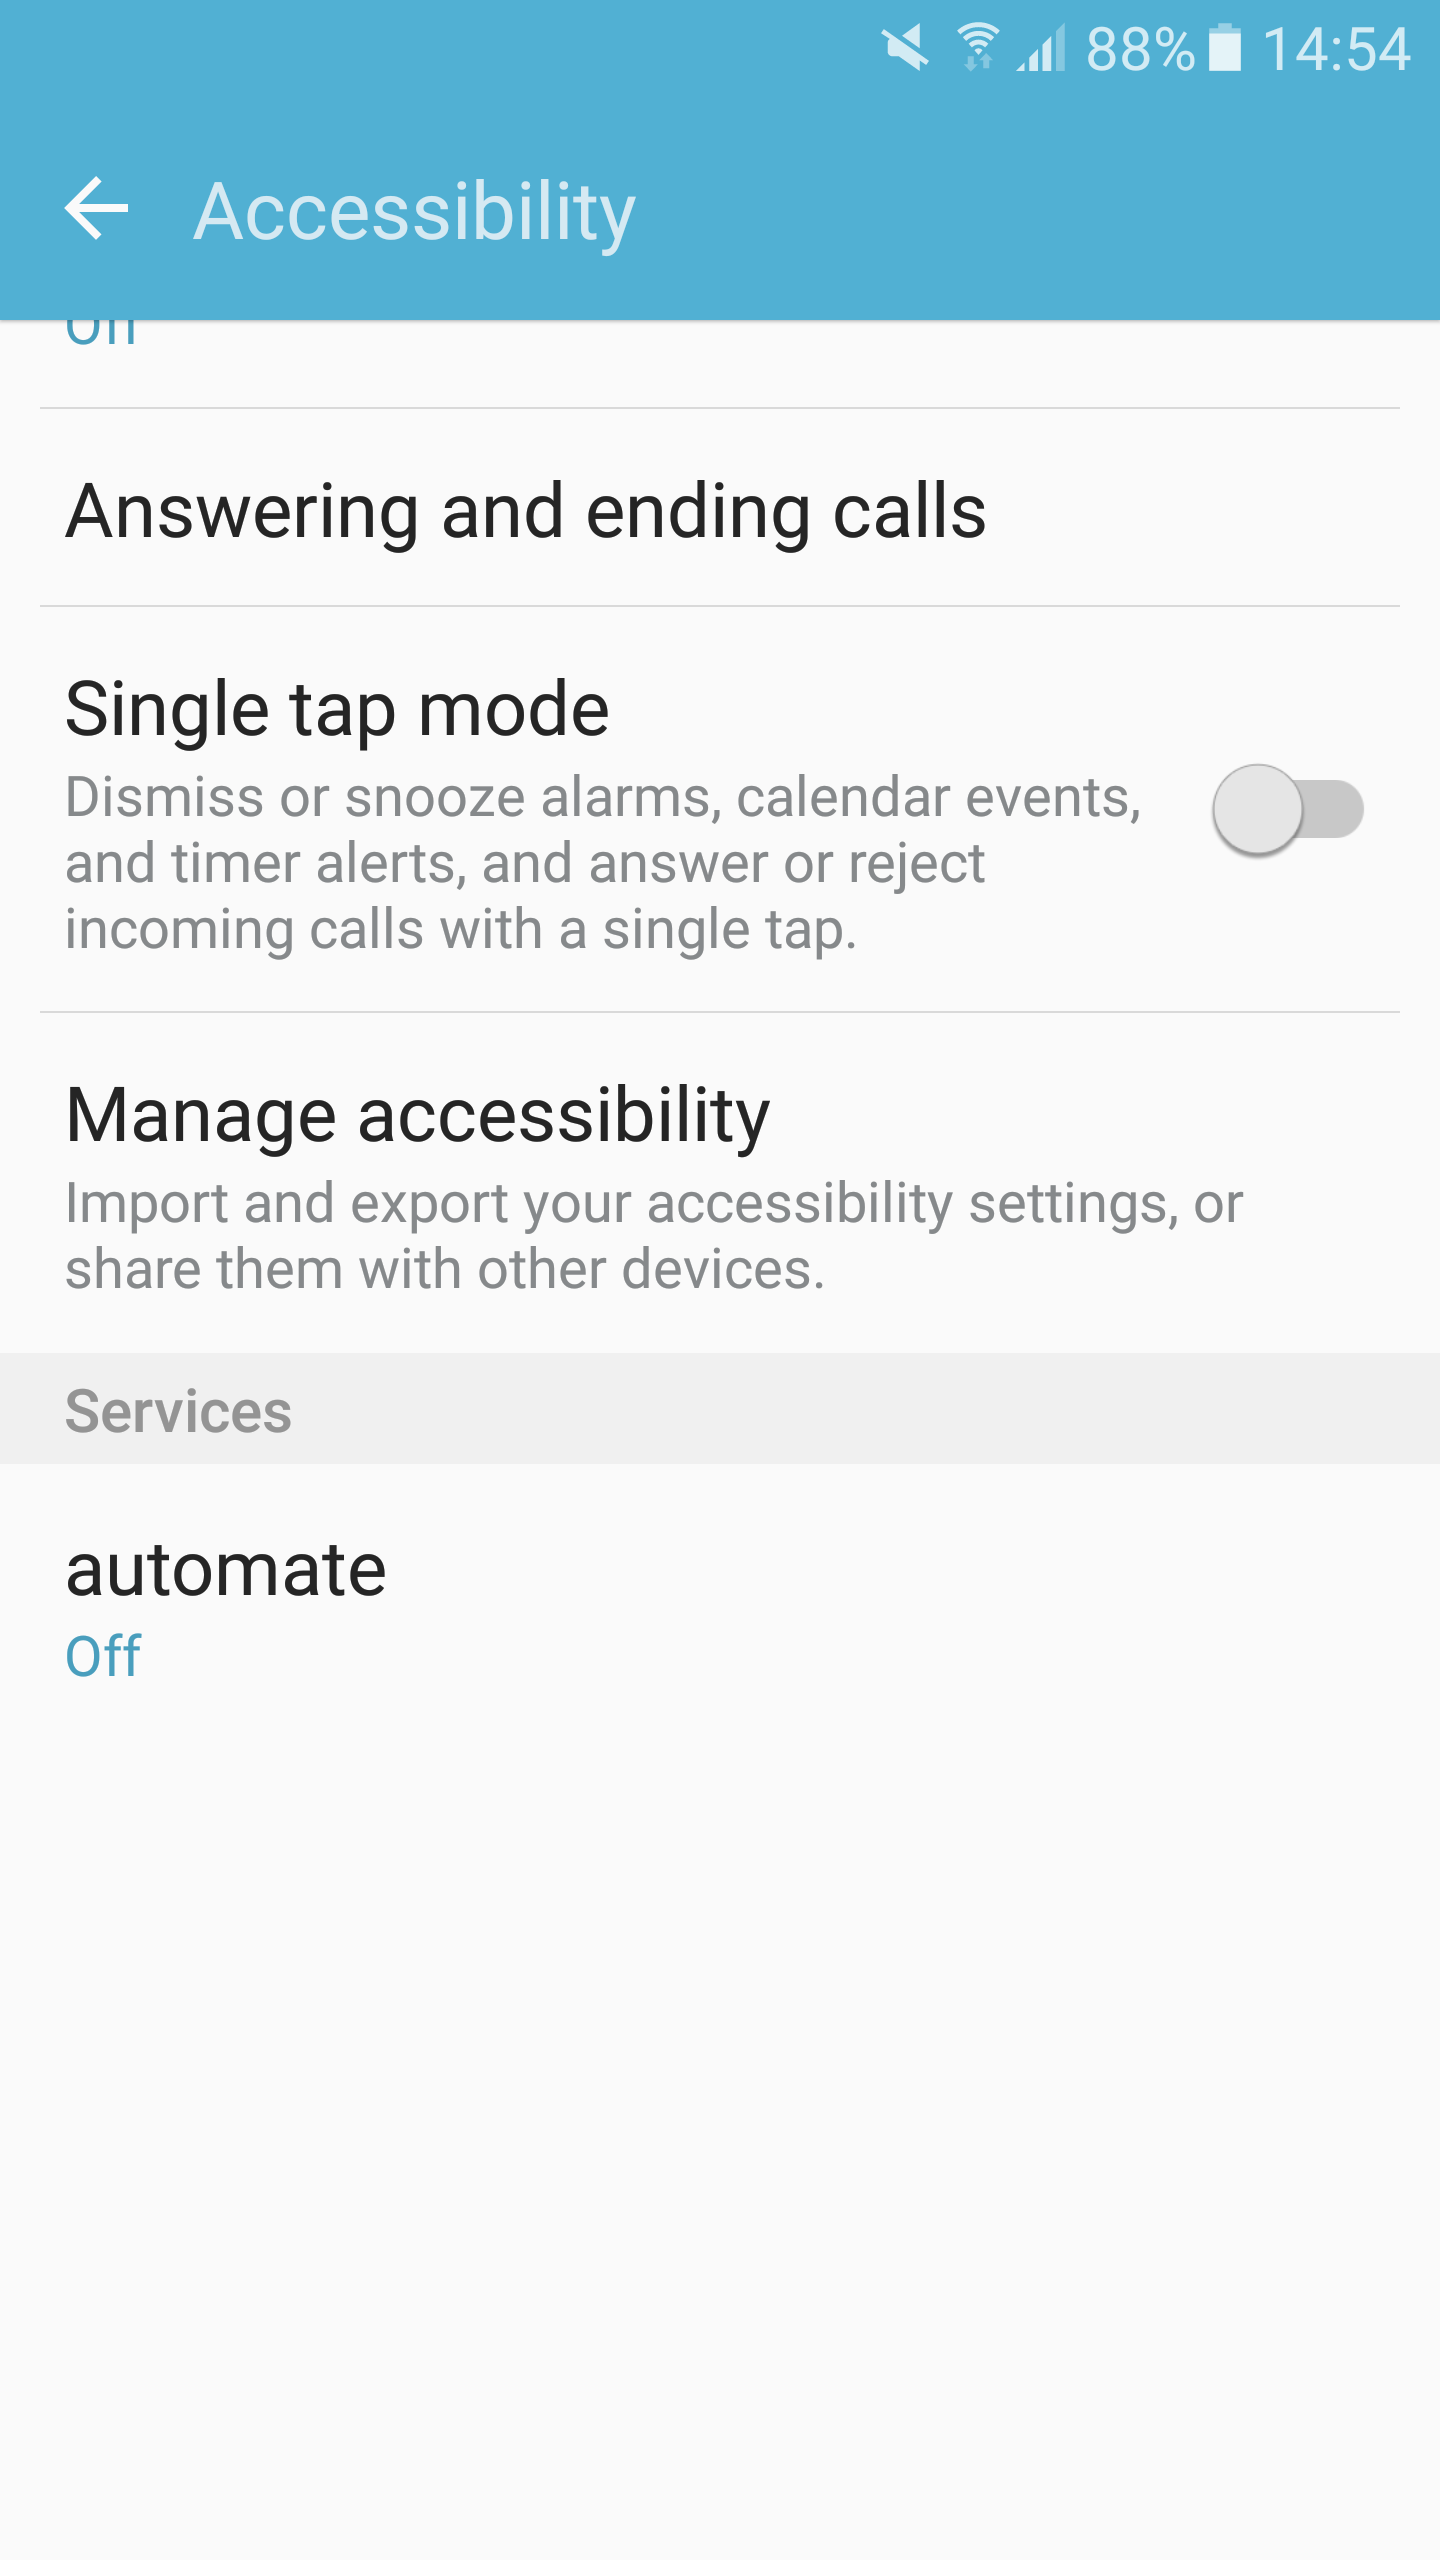
Enable accessibility service
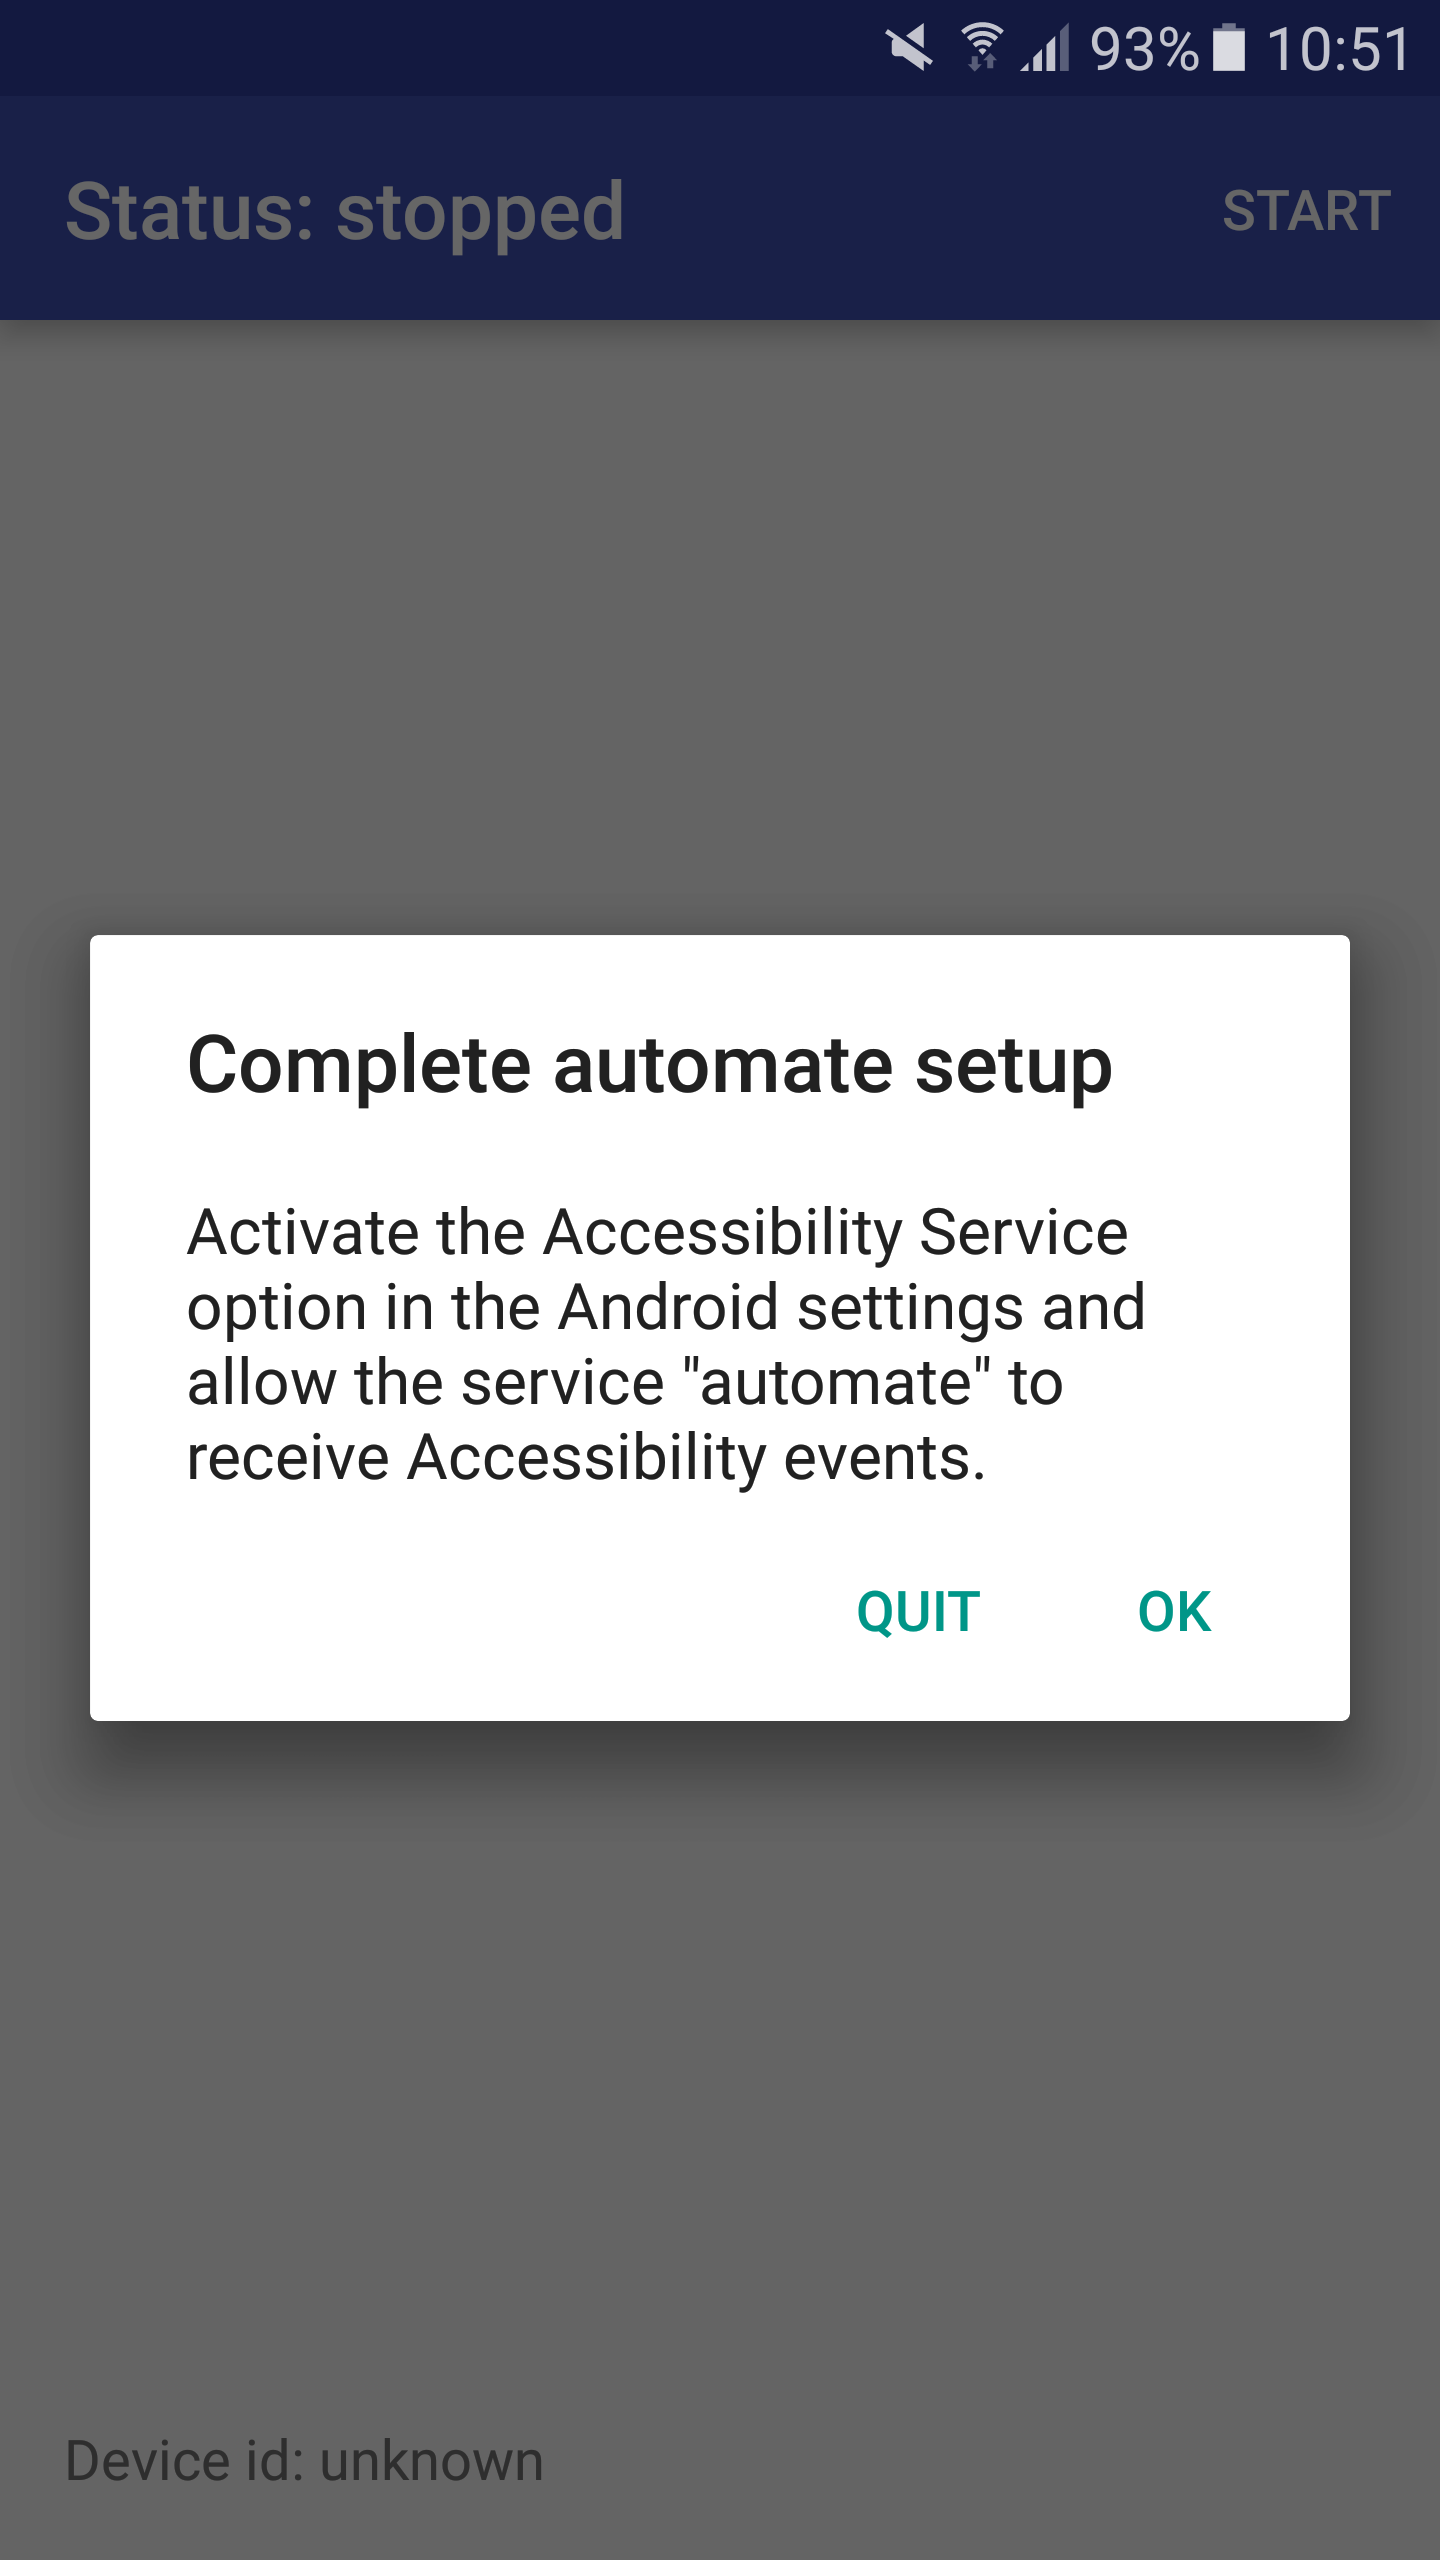
After the app was started for the first time, you will be asked to complete the automate setup. This means to activate the accessibility service option in the Android settings and allow the automate service to receive accessibility events. Figure 6 shows the appearing dialog on a Samsung Galaxy S6 phone, wich will lead you to the accessibility section of the settings.
Figure 6. Dialog for changing the accessibility service settings (left) and automate entry of the Android accessibility settings (right).
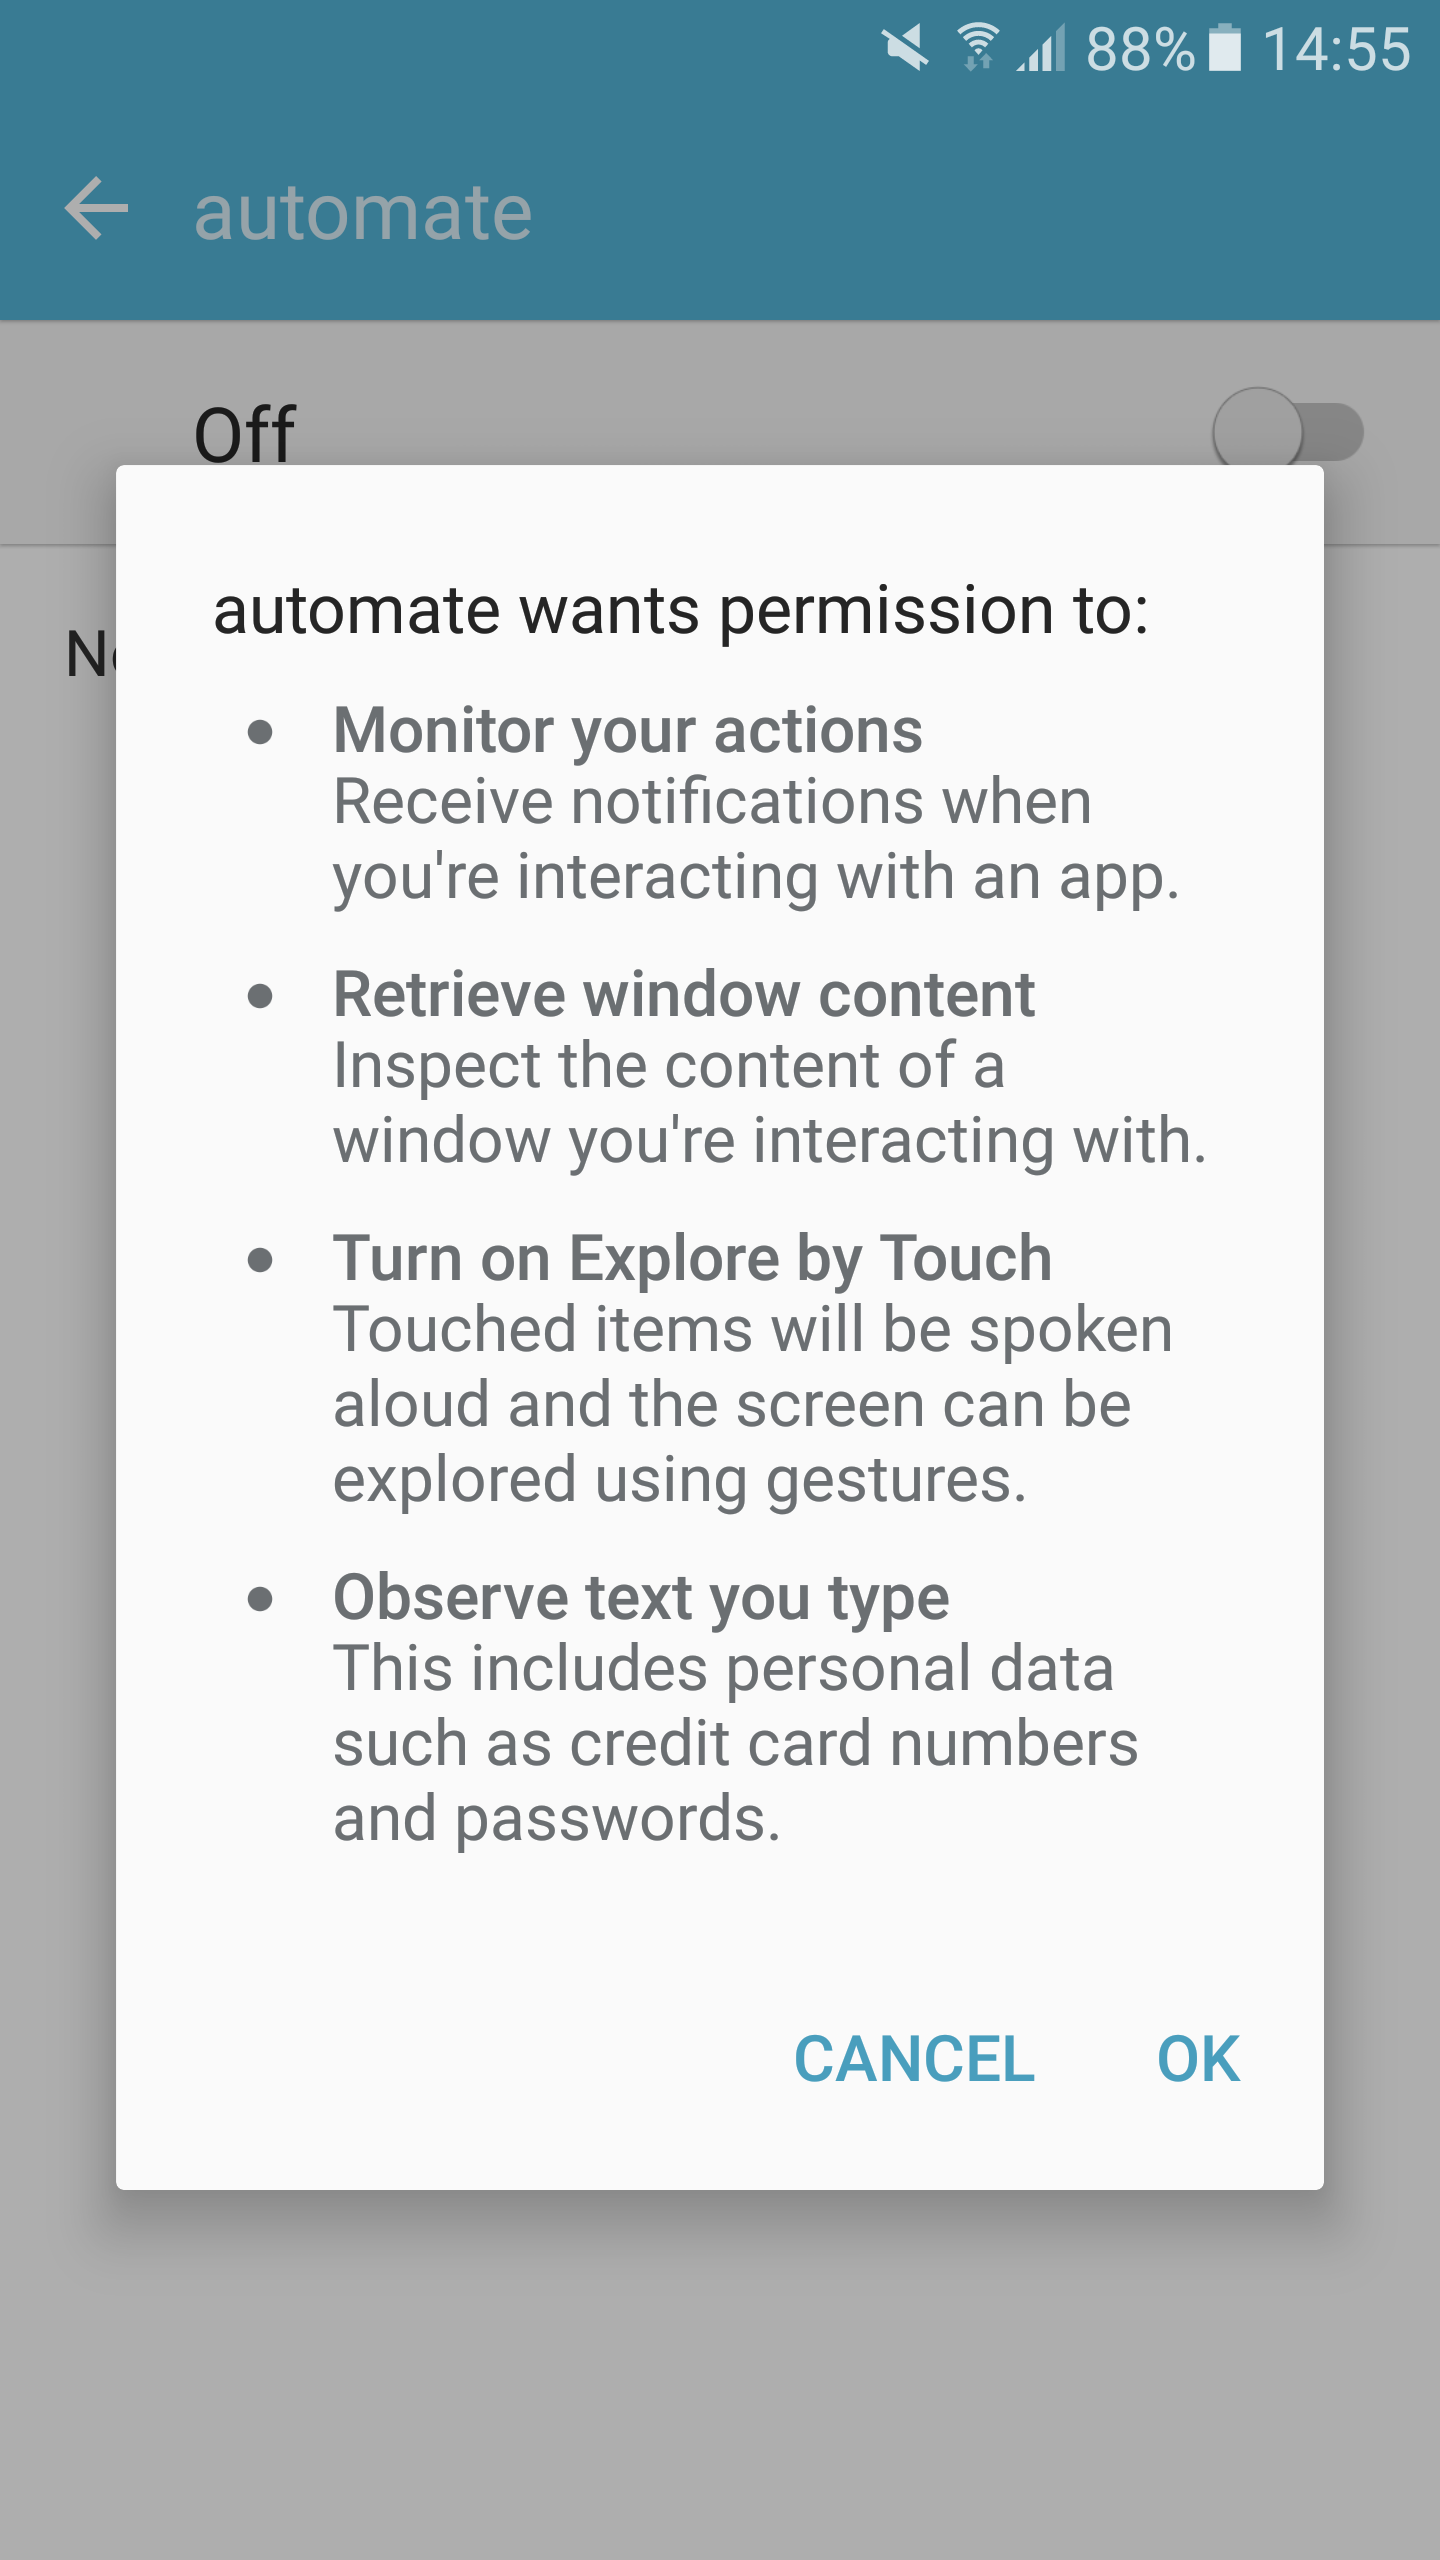
When activating automate as an accessibility service, you will be asked to grant automate several permissions (as seen in figure 7). After you granted the permissions, the tracking starts automatically and you can modify the tracking settings.
Figure 7. Permission request dialog.
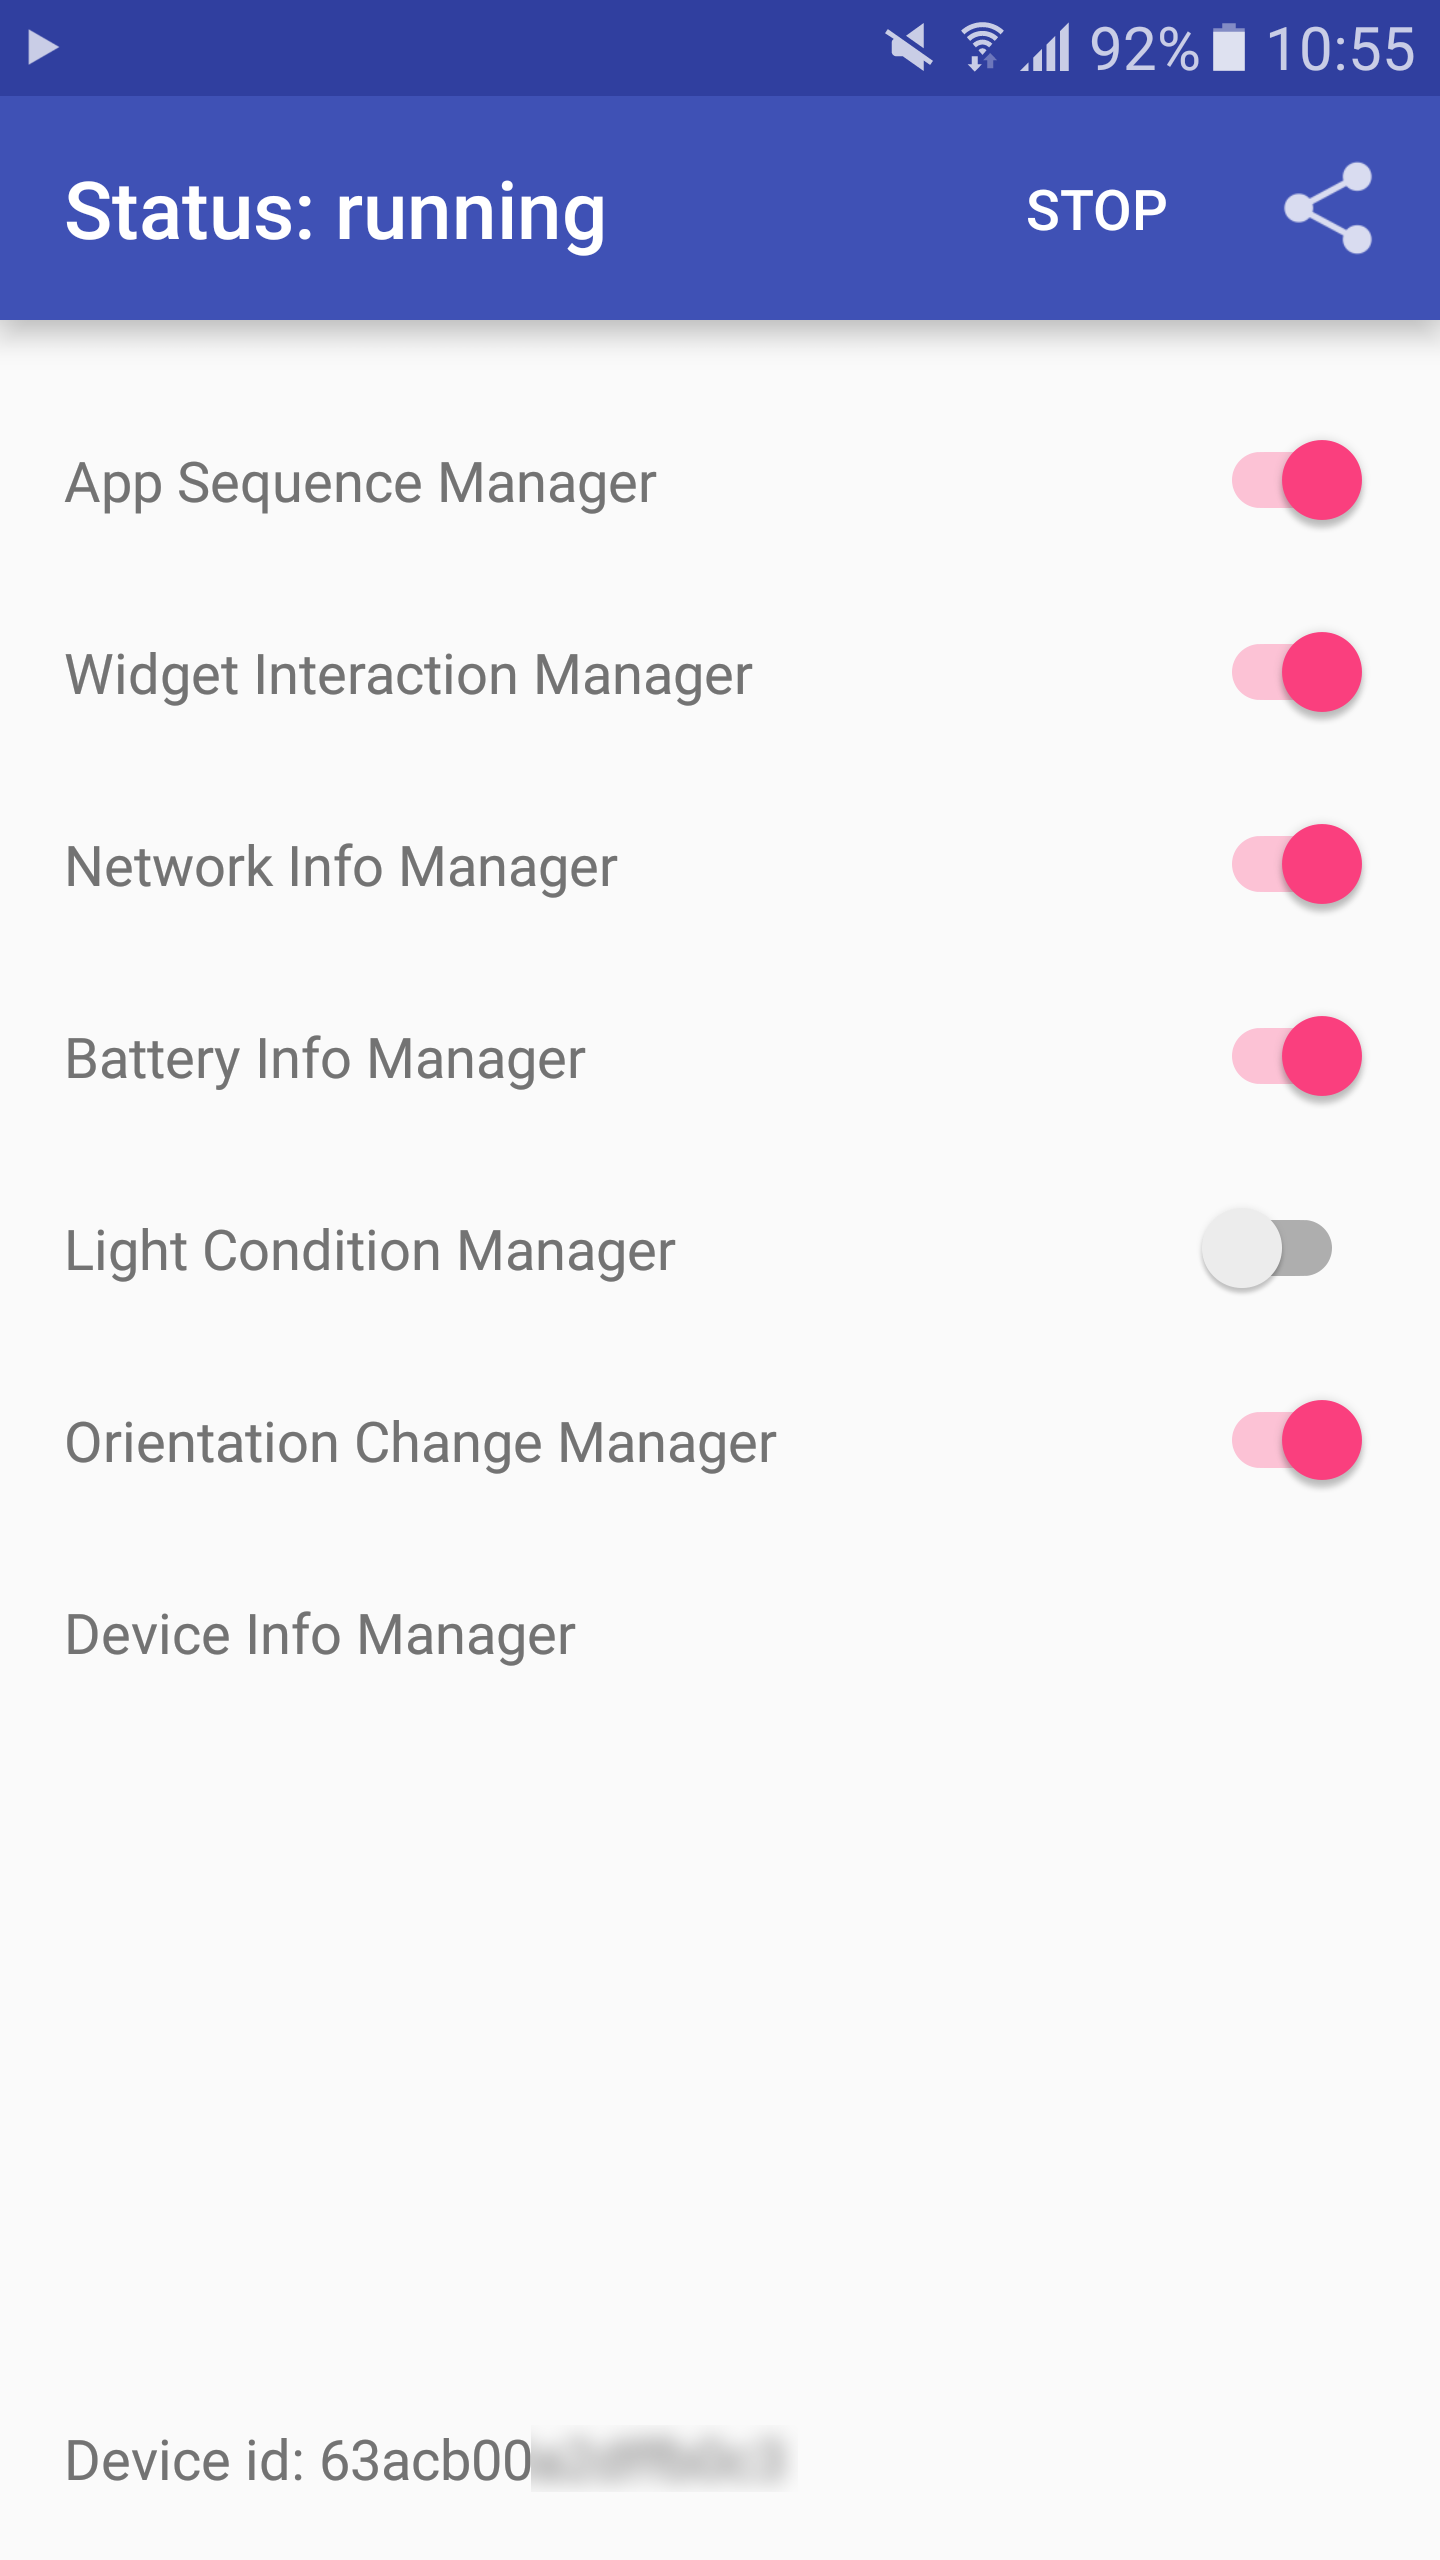
Modify settings (en/disable manager)
Figure 8 shows the settings screen where you can customize what kind of data should be tracked. On the bottom, your individual device ID is displayed. Figure 8. Settings screen with default manager configuration, device ID, start/stop and export possibility.
Each manager can be en/disabled anytime. The whole tracking process can also be stopped/resumed anytime by pressing the start/stop button of the top bar.
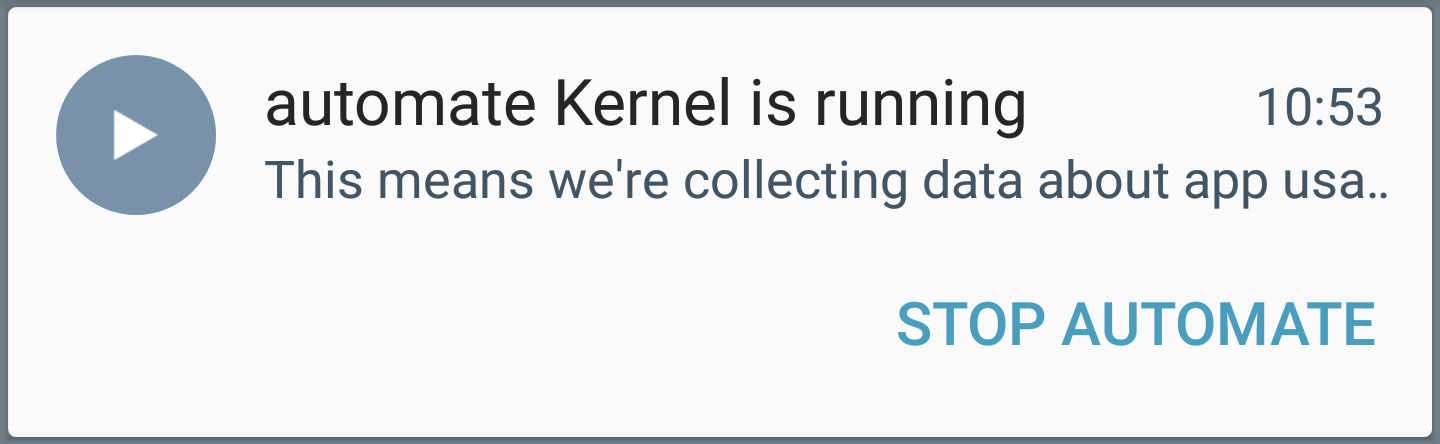
Additionally if the tracking is running, a play icon is displayed in the notification bar and a notification as seen in figure 9 is dispayed.
Figure 9. Notification while automate tracking is running.
Use the phone
When the tracking is running, automate automatically collects the interaction data in the background, depending on your configuration.
View tracked data
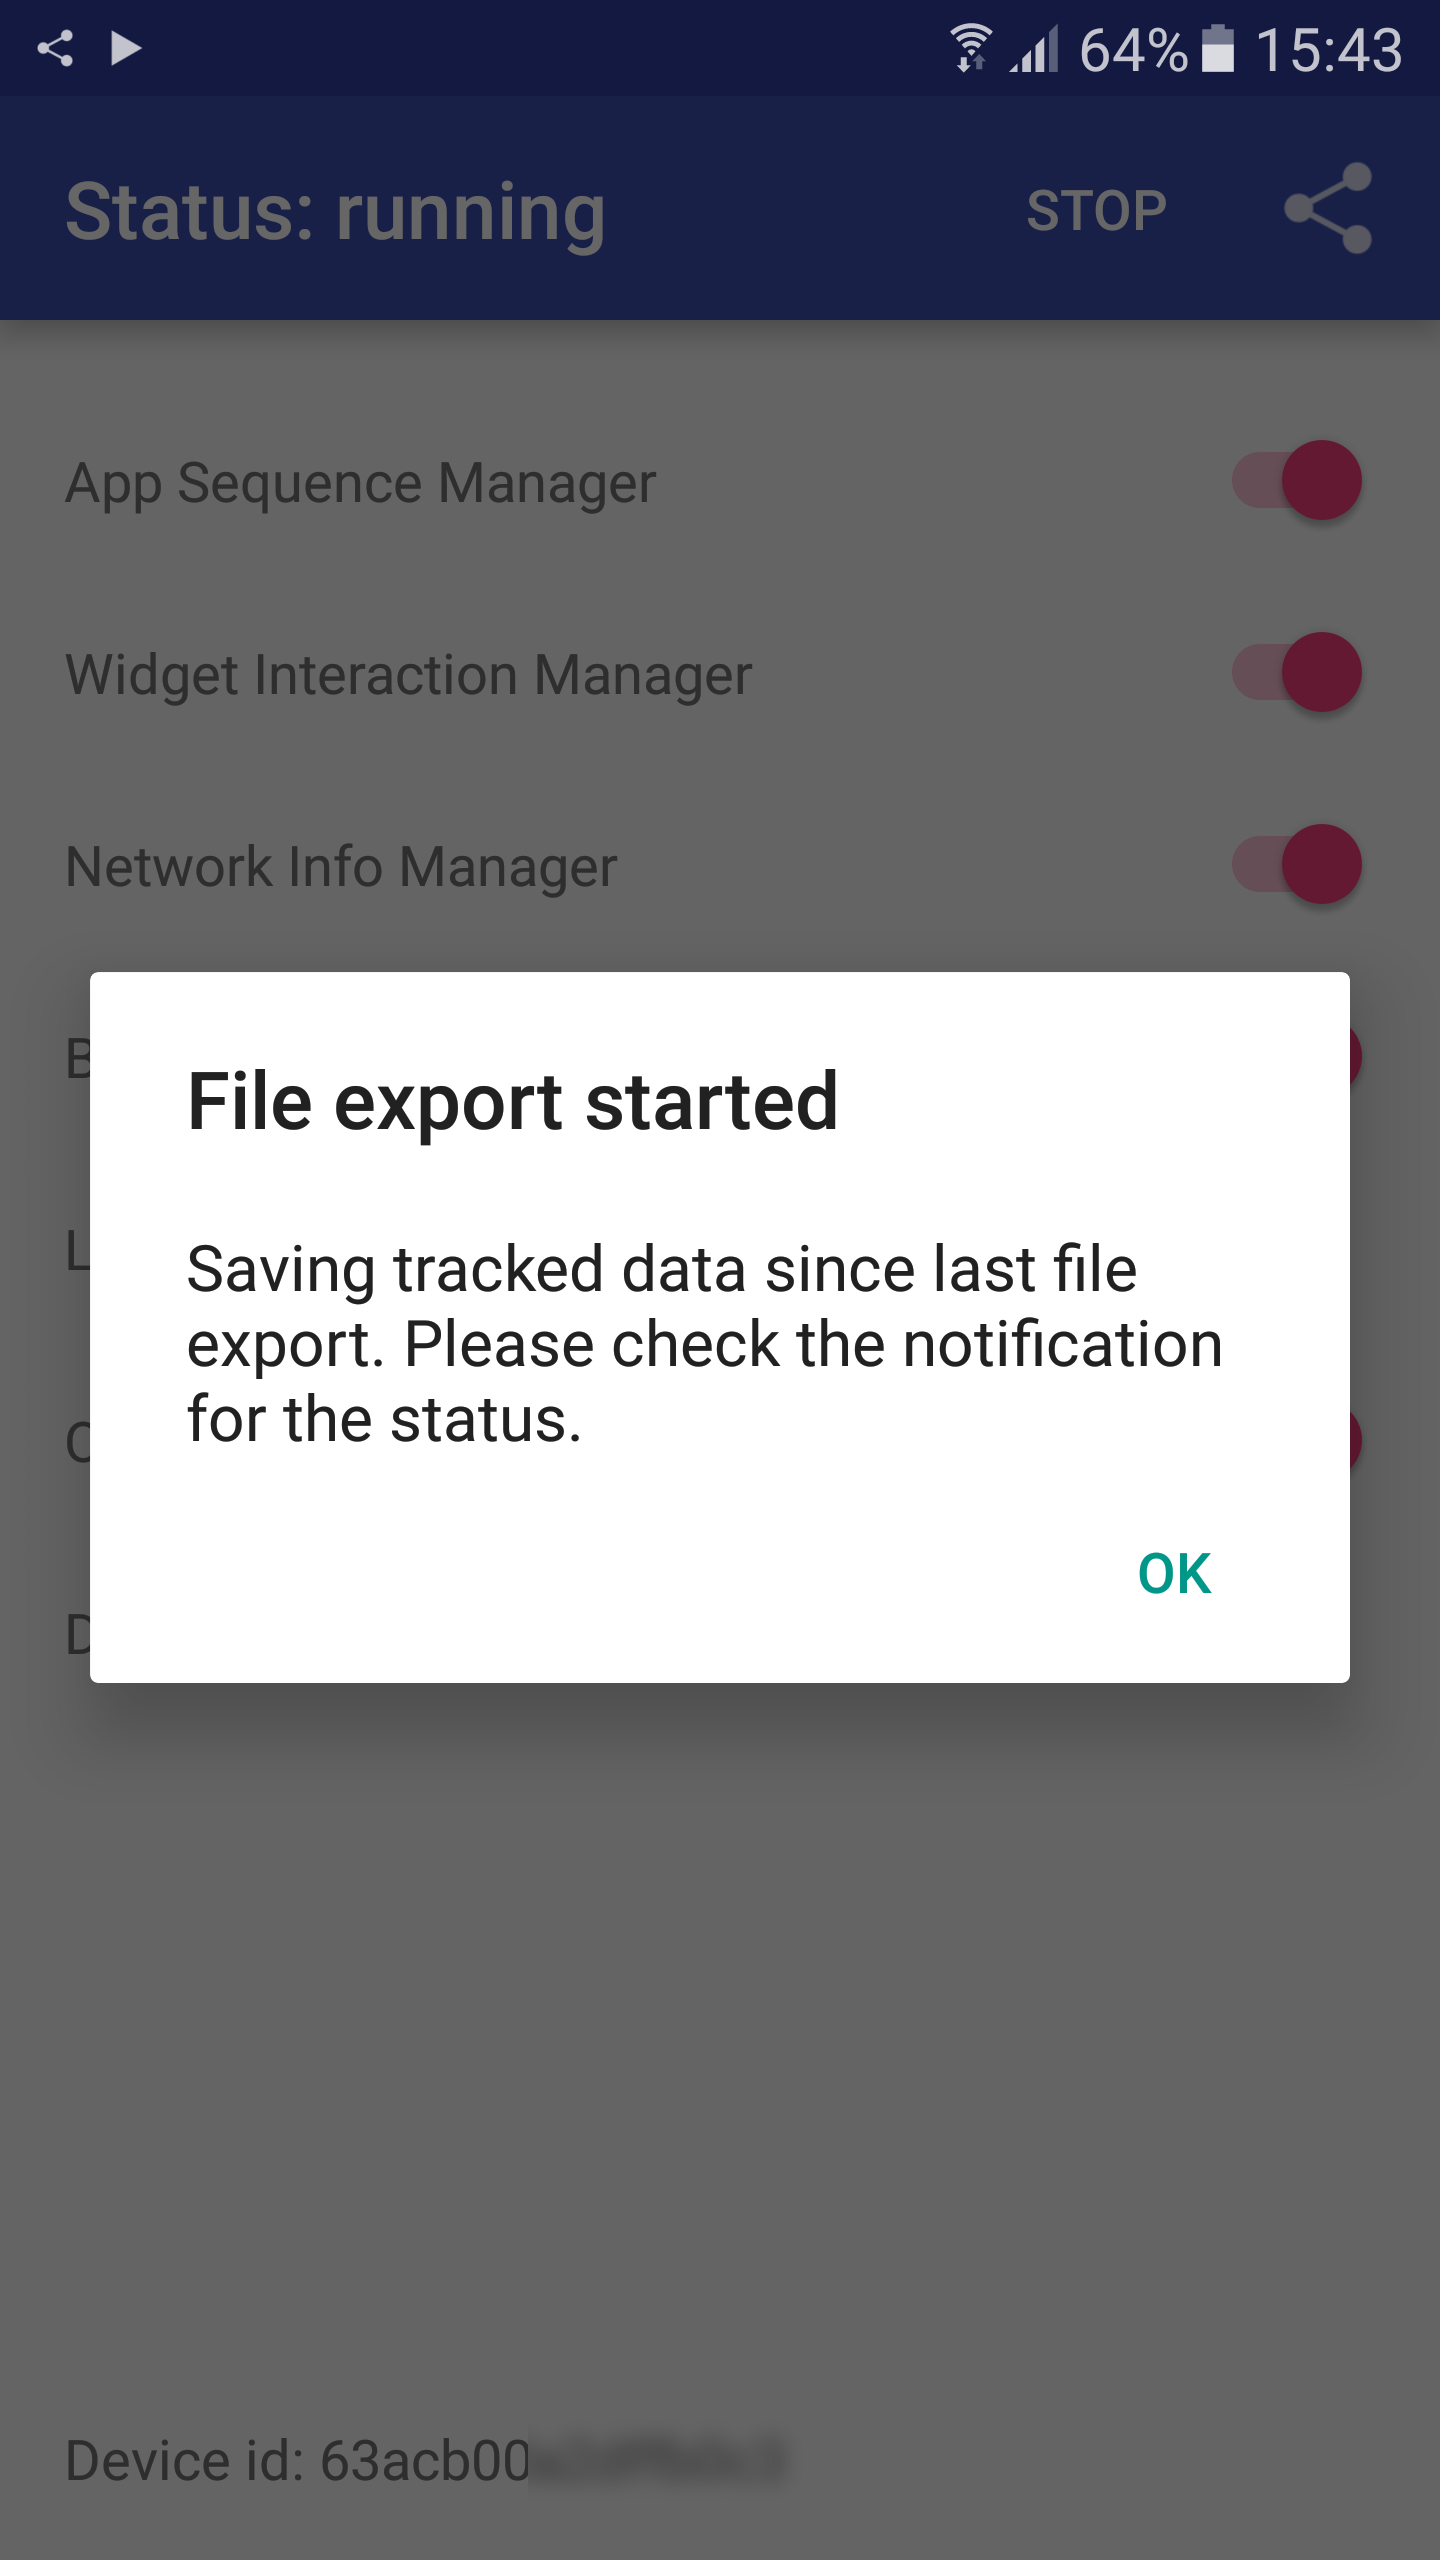
The tracked data can be exported as a ZIP archive of CSV files by clicking the share icon in the top right corner of the automate settings app. Direct access via the file system is currently not possible. This triggers the export process and a dialog (as seen in figure 10) and a notification will be shown while the export process is running. Depending on the size of the data, the export process can take some time. The ZIP archive only contains tracked data since the last file export (or since the initial start).
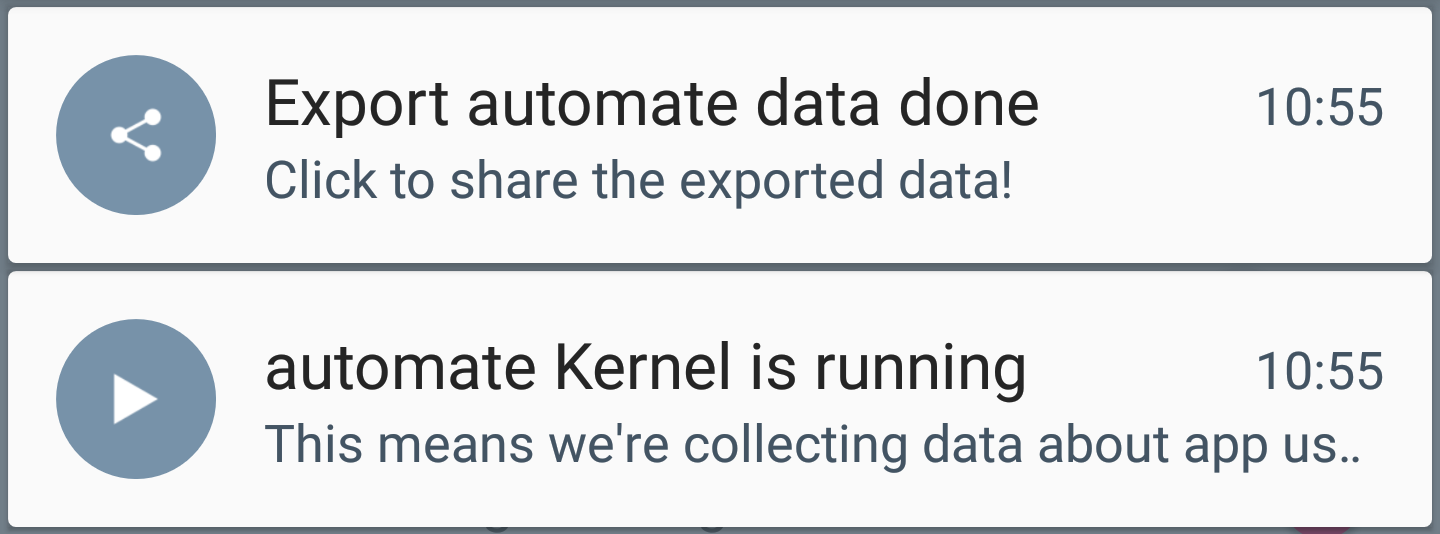
After the process finished, a notification as seen in figure 10 will display "Export automate data done" and the data can be accessed through the Android share dialog.
Figure 10. Exporting process started dialog (left) and exporting process finished notification (right).
Description of CSV content
See CSV description of each manager.
 is displayed in the notification bar and a notification as seen in figure 9 is dispayed.
 in the top right corner of the automate settings app. Direct access via the file system is currently not possible. This triggers the export process and a dialog (as seen in figure 10) and a notification will be shown while the export process is running. Depending on the size of the data, the export process can take some time. The ZIP archive only contains tracked data since the last file export (or since the initial start).
After the process finished, a notification as seen in figure 10 will display "Export automate data done" and the data can be accessed through the Android share dialog.
in the top right corner of the automate settings app. Direct access via the file system is currently not possible. This triggers the export process and a dialog (as seen in figure 10) and a notification will be shown while the export process is running. Depending on the size of the data, the export process can take some time. The ZIP archive only contains tracked data since the last file export (or since the initial start).
After the process finished, a notification as seen in figure 10 will display "Export automate data done" and the data can be accessed through the Android share dialog.